Central Duct AC Install
AHU (Air Handling Unit) Installation and Repair: A Comprehensive Guide
An Air Handling Unit (AHU) is an essential component of HVAC systems that helps regulate and circulate air as part of the heating, cooling, and ventilation process. Whether you’re installing a new AHU or repairing an existing one, understanding the installation and repair processes is critical for the unit’s efficiency and longevity. In this guide, we’ll walk you through the step-by-step installation and repair procedures for AHUs.
AHU Installation Process
Installing an AHU requires careful planning and attention to detail to ensure it performs optimally. Here’s a guide to the steps involved in AHU installation:
( 1). Preparation and Planning
Before starting the installation, ensure that the AHU is compatible with the system and location. Review the following:
- Size and Capacity: The AHU should match the required air flow and system load capacity based on the space’s needs.
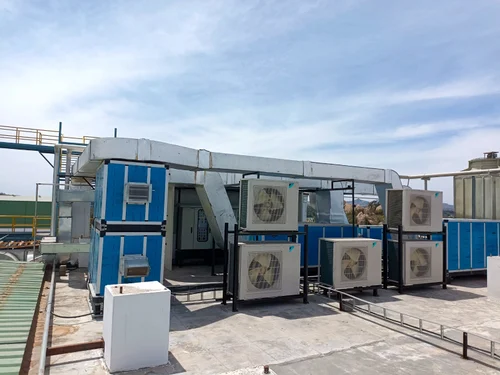
- Location: AHUs are typically installed in mechanical rooms, basements, or rooftops, depending on the system design. Ensure the location has enough space for the unit and necessary connections.
- Safety Precautions: Wear appropriate safety gear, including gloves, goggles, and a mask if necessary, when handling the equipment.
(2). Mount the AHU
- Position the Unit: Place the AHU on a sturdy platform or in a designated area where it will be securely mounted. Make sure it is level to prevent any operational issues.
- Support System: Use vibration isolation mounts if needed to reduce noise and vibration during operation.
(3). Connect the Ductwork
- Inlet and Outlet: Connect the inlet and outlet of the AHU to the system’s supply and return ducts. Use proper duct seals to prevent air leaks.
- Insulation: Insulate the ductwork and AHU pipes to prevent condensation and reduce energy loss.
- Airflow: Ensure the airflow direction is correct according to the system design to maximize efficiency.
(4). Electrical Connections
- Wiring the AHU: The AHU will need to be wired to the power supply and control panel. Follow the manufacturer’s wiring diagram to ensure the proper connections.
- Control System: Connect the AHU to the central control system, such as a thermostat or building management system (BMS), to regulate temperature and airflow.
(5). Connect the Water Pipes (If Applicable)
- Water Inlet/Outlet: Attach the chilled or hot water pipes to the unit’s inlet and outlet connections. Ensure the pipes are securely tightened and insulated.
- Leak Test: Perform a leak test on the pipes to make sure there are no water leaks.
(6). Install the Drainage System
- Drain Line: Install the drain line to the AHU’s condensate pan and direct it to a suitable drainage point.
- Slope: Ensure the drainage line is sloped to allow gravity to move the water away from the unit.
- Condensate Pump: If gravity drainage is not possible, install a condensate pump to move the water to the discharge point.
(7). Testing and Commissioning
- System Check: Turn on the AHU and check for proper airflow, temperature regulation, and water flow (if applicable).
- Airflow Calibration: Verify the airflow rates with a manometer or airflow measuring device to ensure they meet the required specifications.
- Control System Test: Test the control system to make sure the thermostat and sensors are functioning properly.